Dr. Gary Leung

Dr. Gary Leung

| Updated March 2, 2023

If you are thinking about creating a website for your business, here are 12 steps that will help you create and support a professional small business website to attract potential customers and convert them into loyal buyers!

We’ve listed the steps in chronological order (Spoiler alert: Step 12 is often the most neglected but, by far, the most important to get right).

The first step in creating a professional small business website is to get a unique domain name for your business.

Read More …

A website outline is called a “Sitemap”. A sitemap shows how pages are organized in the website

Read More …

When creating content, it’s important to keep your target customers in mind. What are their needs and wants? 

Read More …

There are many different CMS options out there. However, by far, the most popular CMS in the world is WordPress.

Read More …

Small business owners know that having a professional website is essential to their success. A business website is often the first impression potential customers have of your company, and it can be the difference between making a sale or losing out to the competition.

Professional Website for your Smal Business

Almost all consumers turn to the internet before making a buying decision. This includes everything from product research, reading reviews or finding the names, addresses or operating hours of local area small businesses. In light of this, even just a simple, well-designed professional-looking small business website can give your small business an edge. 

Whether you are a Health Professional, offer Accounting Services, own a Home & Garden Services Business or any small business that offer any other type of products and services, a website is often the first impression customers will have of your business.

For small business owners, it’s important to make it count! A professional-looking website that displays equally well on a computer screen, tablet and mobile device will help get new clients, provide a positive customer experience, and generate more revenue for your business.

As a small business that has created and supported over 100 small business websites, we understand the struggle they face trying to juggle web hosting and website development while managing their growing businesses.

Small Businesses are Under-Served by Web Developers

We know what it takes to manage an effective web project and the work required to maintain and support even a small business website once it is launched.

The truth is, small businesses are under-served by the website development industry. Almost all website developers are set up to serve large-scale businesses that require specialized business functions (eCommerce, Inventory management, Customer Relationship Management, etc.) because custom design projects have higher profit margins.

Very few web development companies have enough small business clients to leverage the economies of scale to profitably offer website design combined with the customer service and ongoing support at an affordable price

If you are thinking about creating a website for your small business, here are 12 steps that will help you create and support a professional website to attract potential customers and convert them into loyal buyers! 

Even if you are planning to hire someone to do your website, these 12 steps are a good checklist to review with your potential provider.

Step 1: Get A Great Domain Name

The first step in creating a professional small business website is to get a unique domain name for your business. There are a few things to keep in mind when choosing a domain name.

Step 1 - Get a Great Domain Name for your Small Business Website

Make Your Domain Name Memorable

Most people will type in your web address into their browser without thinking about it, so you want something that’s easy to remember and spell . For example, a domain name that matches your business name or product name exactly is usually the best (and most obvious) choice (e.g., www.SimpleWebsiteService.ca). If this is not available, you may wish to get a bit creative by, for example, adding a city (or region) name to a domain.

Check If Your Preferred Domain Name is Available

You don’t want to spend time and money designing your small business website only to find out that someone else already owns the domain name you wanted. Go to a reputable domain registry service (called a Registrar) website such as GoDaddy.com and see if the domain name you have chosen is available for purchase. 

If the domain name is available, you can purchase it for a one-time fee (typically $20 to $30 per year). 

We generally do not recommend add-on products like “Domain Protection” or “Domain Privacy”, etc. These are money-makers for Registrars that typically don’t add a lot of value.

Avoid Confusing Domain Names

Avoid domain names that may cause confusion. For example, while the number “0” (zero) often replaces the letter “O” on a license plate, it can (and likely will) lead to confusion for domain names. Imagine having to clarify this to your customers every time they try to visit your small business website!

Be Wary of Domain Scams!

Watch out for scams where companies (not your original Registrar) send domain owners emails or letters warning them their domains are expiring and asking domain owners to pay a fee (sometimes as high as $300)  to “renew and protect” their domains. Do not fall for these scams. Once you’ve registered your domain with a reputable company, deal ONLY with that company regarding your domain name.

Once you purchase the domain, you will continue to own it for as long as you continue to pay the annual renewal fee. Whenever someone types your domain name into their web browser, they will be taken to the computer where your website is hosted (more on that later).

Step 2: Create an Outline of Your Small Business Website

A website outline is called a “Sitemap”. This is similar to an outline (think Table of Contents) of a book. It refers to how your website information (i.e., the pages of your small business website) will be organized. Even for a small business website, it is important to have a well-organized sitemap.

Step 2 - Create an Outline of your Small Business Website

A sitemap shows how pages are organized in the website (e.g., Home Page, About Us, Services Page(s), Contact Us, etc.). This is a vital document as it can help you plan your website’s content.

A sitemap will also help you visualize the layout of your small business website. You don’t need to create a sitemap if you’re working with a professional web development team (they will likely create it once they get an understanding of your business and the purpose of your website). 

Create a SiteMap

A typical sitemap (website menu structure) for a small business website may look something like this.

  • Home Page
  • About Us Page
    • Company History
    • Owner/Manager
    • Service Professionals
    • Other Staff
  • Services & Products
    • Service/Product 1
    • Service/Product 2, etc.
  • Contact Us
  • Frequently Asked Questions
  • Blog/Articles 

You can visit some of our Simple Website Service Customer’s websites for examples of how a small business website can be organized.

Keep Your Sitemap Simple

Your small business website should strive to describe your products and services to potential customers in a clear, concise and professional manner. Remember, the more complex your website, the more effort it will take to maintain it.

Step 3: Write Content Using Your Sitemap as a Guide

After creating your sitemap, you will want to start drafting the content for your small business website. This includes everything from the text on your Home Page and About Us page to the images and videos on your Services pages. 

Step 3 - Write Content for your Small Business Website Using Your Sitemap as an Outline

Quality Content is Key

Remember – quality content is key when it comes to ranking high in search engine results pages. However, avoid over-stuffing your website with keywords just for the sake of search engines.

At the end of the day, your potential clients will be reading your small business website content to get an understanding of your services and products. Be sure to use a tone that reflects the qualities of your business.

Write to Your Target Customer

When creating content, it’s important to keep your target customers in mind. What are their needs and wants? How can your products and/or services help them solve a problem or meet a need? 

If you’re working with a professional web development team, they should be able to provide you with assistance to write good content. Often, our Simple Website Service Clients provide us with answers to questions about their products and services and content from their brochures or other marketing materials and we use it to draft their website content. 

Step 4: Determine the Content Management System (CMS) to Use

A “Content Management System” (CMS) is software that helps users create, manage, and modify content on a small business website without the need to write code (or, in many cases, even know how to code at all).

Step 4 - Determine the Content Management System for your Small Business Website

There are many different CMS options out there. However, by far, the most popular CMS in the world is WordPress.

The World’s Most Popular CMS

WordPress is free and open source (publicly available for anyone to download, use and modify). Because of this, it boasts an enormous user base and a huge library of plug-ins (modules that allow small business website designers to perform specific functions without coding) and themes (pre-packaged files that dictate the overall appearance and function of your website).

Using the appropriate plug-ins and a suitable theme enable web designers to economize on the time and effort required to develop a small business website from scratch.

WordPress is Suitable for a Small Business Website

WordPress is best suited for most small businesses that want to create a custom professional website with a minimum of coding (or none at all). 

We use WordPress for all of our Customer’s Small Business Websites as it offers us a platform that allows for flexibility in design and enables us to take a disciplined approach for ongoing website support, maintenance and backup.

Alternatives to WordPress

There are a number of do-it-yourself small business website builders on the market, and many of them are excellent alternatives to WordPress. Some popular services include Wix, Squarespace, Shopify and Weebly. If you choose this route, you will have to determine the best website builder to suite your needs.

Most website builder software allow you to create a small business website without any coding experience as they come with pre-made templates that can be customized using a drag and drop builder. Each of these services has its own strengths and weaknesses, so it’s important to do your research before choosing one.

For example, Wix is great for creating beautiful small business websites but it lacks some of the functionality of other website builder software like Squarespace. On the other hand, Squarespace is more expensive than Wix but offers more features and customization options.

Many do-it-yourself website builders can make things easier (e.g., you do not have to purchase separate hosting for your website as described in the next section). Many promise a website can be launched on their service in “just a few clicks” via their drag and drop builder. However, with each small business website builder mentioned above, you are often limited to the templates offered.

Note Who Owns Your Website

Finally, if you choose to use a website builder, your site resides with the service. This means that you do not really “own” your website since it only works on your service provider’s platform. That is, if you stop using the service, your website goes away too. 

For the above reasons, most small business owners prefer using WordPress because it gives them true ownership of their small business website on a platform that is not controlled by a third party.

Step 5: Purchase Hosting For Your Website

When you launch a new website, you need to find a home for it on the internet. This is what is meant by “website hosting”. A “hosting service provider” is a company that provides space on its “servers” for websites to be hosted. (Think of a commercial-grade computer in a safe, managed environment somewhere in the world that is connected to the internet.)

Step 5 - Purchase Hosting for Your Small Business Website

Small Business Website Hosting Providers

There are many different hosting service providers to choose from. Many hosting service providers offer an easy-to-use interface to set up your WordPress template (blank site). Do some research before deciding which one is right for you.

You should consider factors such as price, features, and customer phone support. It is very important to select a provider that offers good technical support. This will ensure that you have someone to help you when you encounter any issues with your site. Be sure to ask the provider about their support policies before signing up. 

Additionally, make sure that the hosting company has a good reputation for reliability and uptime. This will help ensure that your site is always accessible to your visitors.

Some examples of large hosting service providers include Bluehost, Siteground, Hostgator and Flywheel. All provide similar services with a variety of features and prices. 

Select an Appropriate Hosting Plan

Once you’ve chosen a hosting service, you’ll need to purchase a hosting plan (which is really just renting a computing resource on the internet). This gives you access to a certain amount of space on the server (computer). 

Shared Hosting

The most common type of hosting plan is a shared plan. This means that your website will be hosted on the same server as other small business websites.

While this is often the least expensive option and is likely suitable for most small businesses, it can come with certain risks. For example, if one of the other sites on the server experiences high traffic or uses too many resources, your site may slow down or even go offline temporarily. 

Remember that when it comes to price, you typically get what you pay for. For example, if you’re paying only $5/month for hosting, your website will likely be hosted on a machine along with hundreds (if not thousands) of other small business websites – all competing for the same computing resources. There’s also little incentive for the hosting company to keep their server running in tip-top shape. 

Virtual Private Servers for Larger Websites

For larger sites, a VPS (“Virtual Private Server“) may be a better option. A VPS reserves an entire server for your website, which ensures that your site won’t experience any slowdown due to resource contention due to other websites. However VPS’s tend to be too expensive for most small businesses.

Some hosting service providers also offer email accounts and domain registration (see Step 1). However, we recommend small business website owners keep domain registration separate from website hosting. This is so that future decisions about website hosting providers do not impact domain ownership.

Support & Reliability

By following these tips, you can purchase website hosting that will provide you with good technical support and reliable performance (yes, even for small business websites). 

For our Simple Website Service Customers, we use Amazon Web Hosting (AWS). AWS is the world’s most comprehensive cloud platform offering best-in-class reliability, security and performance. However, it does not provide an easy user interface for non-technical users.

Step 6: Create Your Branding Guide

Before you begin designing your website, it is important to establish a “Branding Guide” for your business. A branding guide is a document that outlines how a business wants its branding to be displayed. This includes your company logo, fonts and colours that should be used.

Step 6 - Create Your Small Business Website Branding Guide

It’s important to have a branding guide so that all communications (both online and offline) are consistent and look professional. Having a branding guide can also help to build brand awareness as people will know what to expect when they see or hear your company name.

Your Company Logo

Your Company Logo is one of the most important elements of branding and should be included in all communications. Make sure the logo is simple, memorable and easy to recognize. 

You may also want to include alternate versions (e.g., in black and white, for mobile site display, etc.) to make sure it looks good in all situations.

Website Colours

Use colours that reflect your company’s personality and are consistent with your logo. Choose a colour for text, headings and background and use it consistently throughout your website. 

Try to avoid using too many different colours as this can be confusing for your customers.

Website Font

Choose fonts that are simple and easy to read, and use it consistently throughout your website. For example, you may choose to consistently use one font for titles and a different (but complementary) font for normal text.

In addition to the above, a branding guide should also include guidelines on how to use the branding elements effectively. For example, you may want to specify the minimum size of the logo or how far it should be from other text. 

A Unified, Professional Branding Strategy

A branding guide is an important tool for businesses to create a unified and professional branding strategy. By following the guidelines in this section, you can ensure that all communications are consistent and reflect your company’s values. Establishing a branding guide may take some time but it will be worth it in the long run!

Step 7: Design The Front-End Of Your Website

Okay, so you’ve registered your domain name, purchased a hosting plan and set up a WordPress template on your web hosting server. You’ve also created a sitemap, written content for each of your web pages. With your Branding Guide in hand, you’re ready to build your website. 

Step 7 - Design the Front-End of Your Small Business Website

Choose a WordPress Theme

The best way to choose a WordPress theme is to think about what type of small business website you want to create. There are WordPress themes designed for specific industries (health care, medical, financial, legal, etc.). There are also many themes that are versatile and can be used for a variety of industries.

Premium WordPress Themes

Most Premium (i.e., ones that you have to pay for) WordPress themes will cost between $50-$100 for a single-use license. This typically includes support and updates for the first six months. After that, there is usually a similar cost to extend the support license (for regular updates, bug fixes, etc.).

We advise choosing a theme that has sold hundreds, if not thousands of licenses. This enables the theme developer to leverage economies of scale to provide support and frequent updates to customers. Popular themes also benefit from large user communities so any bugs or required upgrades are quickly identified.

Responsive (Mobile-Friendly) Themes

Most, if not all, WordPress themes sold today are “Responsive”. This means they automatically render on a variety of devices and screen sizes. 

Once you’ve decided on a theme, take some time to browse the theme’s demo site(s). This will give you a good idea of what the theme looks like and how it can be used. Premium themes usually come with pre-configured designs and menu structures. In many cases, you’ll be able to choose the fonts and colours to use (from your Branding Guide).

If you like what you see, purchase and download the theme and install it on your web hosting server.

Configure Your Small Business Website

This is where you tell WordPress what content to display on each of your web pages. To do this, you use the “Pages” and “Posts” menus in the WordPress dashboard.

The Pages menu lists all of the static pages on your website (e.g., Homepage, About Us, Services, etc.). To create a new page, go to Pages > Add New. Enter the title of the page and the content. You can also add a featured image for the page. When you’re done, click Publish.

The Posts menu lists all of the dynamic blog posts that will be published on your website. To create a new blog post, go to Posts > Add New. Enter the title of the post and the content. You can also add a featured image for the post. When you’re done, click Publish.

You can also configure your website’s settings from within WordPress. To do this, go to Settings > General. Here, you can enter your website’s name and description, as well as set up some basic settings like whether or not to allow comments. For most WordPress themes, you can also set the site Title and Logo under the Appearance > Customize section.

Source High-Quality Images to Match Your Written Content

Use high-quality images to give your site a professional look. Not only do good images make your site more visually appealing, they also help communicate the essence of your business. It’s worth investing in great images. 

Your written content might be great, but in ten seconds or less, the images on your small business website will do all the talking and inform a viewer’s decision to stay or go. Potential customers will relate the professional look of your website to the professionalism of your business. The converse is also true. 

Use Great Images

While there are many sites that offer free images you can download, chances are, they are low resolution or so commonly used that your customers may have encountered them elsewhere. 

For our business, we purchase images from iStockphotos for our client’s websites. This can be expensive, but it is well worth the investment to get a great-looking site. 

Using good quality images sets a business standard that customers will appreciate. Great photographs also emphasize your products and services in a way that words can’t convey as well. So don’t skimp on the visuals for your small business website – go with high-quality images instead!

Mind you NAP (Name, Address, Phone Number)

No, we’re not talking about getting enough sleep (although that’s also important). One of the most important aspects of a successful website is ensuring that your business name, address and phone number are accurately listed on every page.

This is often referred to as “NAP” for Name, Address, Phone Number. It’s important to ensure that this information is consistent across all of your web presences – including your website, social media profiles, local directories and more.

Make It Easy for Customers (and Google) to Find You

There are a few reasons why it’s so important to have accurate NAP information. First and foremost, search engines rely on this data when trying to understand your business so they can present accurate search results. If the information is not correct or inconsistent, it can negatively impact your search ranking and make it difficult for potential customers to find you online. 

Additionally, clients who are looking for your services or products may decide to contact you at any point during their browsing journey. Make it easy for them to contact you (e.g., without having to navigate to a different page to find your address or phone number).

For almost all of our Simple Website Service Customers, we make sure their Business Name, Address and Phone Number are prominently displayed on every page of their website.

Step 8: Test Your Website Design On All Platforms

Once you’ve completed your website design, make sure you check how it looks on desktops, tablets and mobile phones. As discussed previously, while almost all premium WordPress themes are responsive (i.e., built from complex grids and flexible images that will automatically rearrange themselves depending on their screen size or resolution), the way it displays on a variety of devices may not be what you intended. Make sure you check every page on each device to ensure your site displays as intended.

Some WordPress themes allow you to display and edit the exact look and feel of your new website for each device type. For example, you may be able to specify the image dimensions and orientation as well as the way menus are displayed for each device type.

Pay special attention to text/font size, margins and spacing of the different elements of your site for different screen sizes. 

In some cases, you may even want to hide some elements of your site for certain display types (e.g., a large image looks great on a big screen but may overflow off a small mobile screen). 

Check Your Mobile Site

With over 50% of your customers doing internet search with their phones, your website has to provide a good mobile experience. Having a mobile-friendly website is no longer optional. If your mobile visitors don’t have a good experience on your site, you’ll drive away a huge portion of your potential customers. 

Google Penalizes Non-Mobile-Friendly Websites

In recent years, Google has also placed a high level of prioritization in their ranking algorithm for sites that are mobile friendly. For all of our Simple Website Service Customers, we use Google’s Mobile-Friendly Test to ensure the effectiveness of our responsive design.

Step 9: Connect Your Domain Name To Your Website

At this point, you have created a website on a hosted server (that you’ve rented).  However, it is still not accessible to the general public. In order to make the site accessible to anyone on the internet, you need to connect it to the domain name you purchased in Step 1

Step 9 - Connect Your Domain Name to Your Small Business Website

Domain Names and Servers

All computers that are publicly accessible on the internet (e.g., web servers or web hosting computers) are accessed by other computers using a string of numbers. These numbers are known as “IP addresses”. When you open your web browser and go to a website, you don’t have to remember and enter these long numbers associated with each website. Instead, you can enter a domain name like Amazon.com or TrumpetMedia.ca and still end up in the right place.

The internet uses a “Domain Name Server” (DNS) system that works much like a telephone book. Copies of this DNS system (think very large lookup tables matching domain names to their associated IP addresses) reside on computers in various locations all over the world. This built-in redundancy means the world’s internet service isn’t dependent on the health of just one single computer with one lookup table (DNS).

DNS – The Internet’s “Phone Book”

When you purchase a domain name (Step 1), you can update your domain name’s DNS pointer by adding the IP address of your hosting service provider (Step 5). This information is then sent by your Domain Registrar (e.g., a service like GoDaddy.com) to all copies of the world-wide DNS system. Depending on the location of each DNS computer, it can take anywhere from 15 minutes to 72 hours to update. 

So, when you type a domain name into your web browser, your computer automatically visits one of the Domain Name Servers in the world, retrieves the most recently updated IP address associated with that domain name you entered and takes you to that IP address.

Connecting Your Domain Name to Your Web Host

Your hosting service provider will provide you with instructions on how to log into your Registrar and point your domain name to your website. At a high level, your hosting service provider will ask you to follow these steps.

  1. Login to your Registrar’s website and find your domain in your account;
  2. Access the “nameserver settings” for your domain (sometimes, this is labelled “DNS settings” or “access DNS”);
  3. Replace your existing Registrar’s “nameservers” with the ones for your hosting service provider. There are typically two entries for this. The format looks something like the following:
    • ns1.HostingProviderName.com
    • ns2.HostingProviderName.com
  4. Save your changes. 
  •  

For example, when we launch a new website for our customer, we access their Registrar account and update their DNS settings so their domain name points to our Amazon AWS Server where their new website is hosted.

As mentioned above, it takes anywhere from 15 minutes to 72 hours for all of the world’s DNS computers to update. So don’t be alarmed if the above changes do not happen immediately.

Step 10: Secure Your Small Business Website

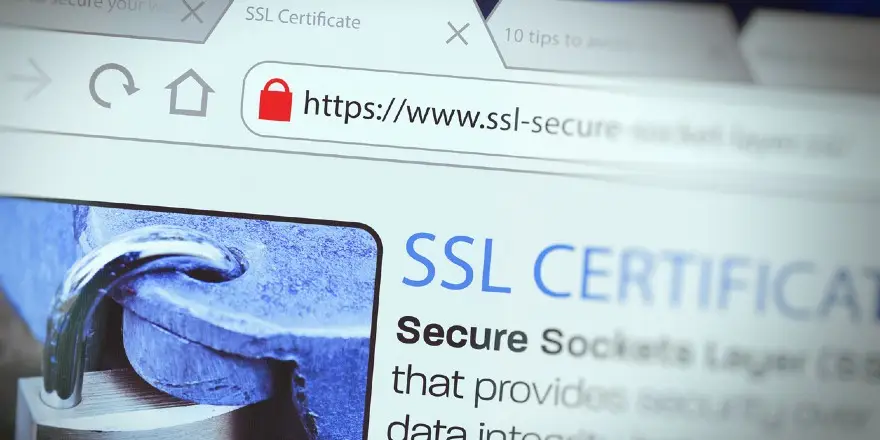
SSL (Secure Sockets Layer) and its successor, TLS (Transport Layer Security), are protocols for establishing authenticated and encrypted links between networked computers. Today, most people use the term “SSL” to generically refer to these protocols.

Step 10 - Add SSL Security to Your Small Business Website

An SSL certificate (also known as a TLS or SSL/TLS certificate) is a digital document that binds the identity of a website. 

Your small business website needs an SSL certificate

Any websites without the SSL certificate will remain http (e.g.,, have the format http://DomainName.com) while those with encryption will show https in users’ browsers (e/g/. https://DomainName.com). Search engines are cracking down on perceived ‘non-secure’ websites.

For example, Google has announced that they will use SSL certificates to rank sites more highly in search results. This means if your website doesn’t have an SSL certificate, its traffic could decline. 

Unsecured Websites are Blocked By Some Web Browsers

Many web browsers have begun issuing warnings that non-https sites are insecure. So, most consumers will navigate from your website if they get a warning that it does not have an SSL certificate. 

Your hosting service provider should be able to help you to obtain an SSL certificate for your website. For our Simple Website Service Customers, we install SSL certificates issued by Let’s Encrypt, a non-profit certificate authority run by Internet Security Research. Group.

Step 11: Tell Search Engines About Your Website

Once your website has been launched and secured, you want to make sure it can be easily found by customers in your local area. It is important to tell search engines about your website.

Step 11 - Tell Search Engines about Your Small Business Website

As the dominant search engine in the western world, Google accounts for almost 90% of all online searches in North America. For this reason, it is very important for owners to “tell” Google about their websites and to follow Google’s published guidelines for website owners. 

Google Search Console for your Small Business Website

Google Search Console is a free service that allows small business website owners to monitor, maintain, and troubleshoot their site’s presence in Google Search results. Because Google regularly “crawls” (reads) the entire internet and indexes new web pages or changes to existing web pages, you do not have to register your site on Search Console to be included in Google Search results. However, registering on Google Search Console will help you to understand and improve how Google sees your site.

Submit Your Sitemap to Google

We think registering your site on Google Search Console is a best practice. It is part of our process when launching a new Small Business Website for our customers. This allows us to submit a client’s Sitemap to Google and identify if there are any problems that Google may encounter.

We also monitor our Google Search Console regularly to stay informed of issues such as server errors, site load issues, and security issues like hacking and malware as well as to ensure any site maintenance or adjustments we make happen smoothly with respect to search performance.

As Google advises: “Even if you won’t be using Search Console yourself, you should be aware of it, become familiar with the basics of optimizing your site for search engines, and know what features are available in Google Search.”.

Search Engine Optimization (SEO)

An overview of SEO and SEO tools is outside of the scope of this guide. However, you should do your best to help search engines like Google to understand your business. This includes: 

  1. Using the right keywords to describe your services and products;
  2. Ensuring information about your small business (name, address, phone number, hours of operations, etc.) is accurately reflected on your website; and
  3. Updating information on your website in a timely manner if anything changes.

Ultimately, good SEO is about making sure search engines understand the “truth” about your business. To that end, we spend a lot of effort telling Google and other search engines about a business when we launch a new website for a client.

Avoid “Black-Hat” Tactics

On the other hand, avoid tactics that try to “trick” search engines into ranking your website higher (keyword stuffing, excessive link building, buying links, etc.). If someone promises they can get you to the top of Google search results, it’s probably too good to be true.

Ultimately, when we consider an SEO tool or tactic, our guiding principle is to ask ourselves the following question. “Is this [SEO tool or tactic] something that search engines like Google or Bing would want us to do to further their understanding of this business?” If the answer is “No”, we would not do it.

For example, we do not think Google or Bing would want us to add links to our clients’ new websites from hundreds of unrelated, low-quality websites.

Step 12: Have A Website Support Plan

Getting a new website is not just about the development project. Having an effective and affordable support and maintenance capability in place is crucial to the success of your business. Maintaining a small business website can be difficult, especially when your business is growing. 

Many small business owners fail to consider the total cost of ownership when starting a web development project. In fact, most of our clients come to us with outdated websites that have been neglected and unsupported. Many have lost the ability to access the Content Management System (CMS) of their website to do even the simplest of updates. Some have also lost access to their domain name (Registrar account).

Many Small Business Website Owners Under-Estimate Support Requirements

By far, support, backup and maintenance are the most under-estimated parts of website ownership. There is an ongoing level-of-effort and cost associated with your website. Because of this, we don’t really think of ourselves as a web development company. Rather, we’re a customer-service organization offering a Simple Website Service that includes life-time support for our customers. 

An effective website support, backup and maintenance plan should include the following.

Website Content Edits

Your business evolves and so must your website. As your business grows, it’s important that your website always reflects the most up-to-date information about your business. 

This may include changes to your NAP (Name, Address or Phone Number) if you move, additions or removal of services or products, pricing changes, special promotions, professional staff (job titles, personal biographies), hours of operations (including special seasonal or holiday hours).  

Some small business website owners may require additional pages be developed for their site, logo changes, new images or other files added regularly. In this case you will need a resource to complete the task of adding content in a timely manner.

It can be difficult to keep track of all the changes that need to be made to your website. It is easy for things to fall through the cracks when you’re also managing a growing business. If you’re planning to do all updates of your small business website on your own, make sure you set aside ample time to regularly login to your WordPress site, Registrar and hosting accounts. 

Software and Software License Updates

Developers often issue updates to software used on websites. This includes updates to WordPress themes and plug-ins that your site is using as well as to WordPress itself or software used by your hosting service provider. Updates are regularly issued by software developers in response to new security issues that are discovered from time-to-time.

Make sure you have a plan in place to identify and install necessary software updates as they are released. 

Regular Backups

Things can and do go wrong with websites periodically. When (not if!) that happens, you’ll need to be able to restore your website quickly.

We believe that ideally, websites should be backed up at least once a day. Each backup is a “snapshot” of the entire website (content, code, database, etc.) that can be used to fully restore a website in case of hardware failure, spam attacks, human error or other unexpected failures. 

We backup our customer websites on a nightly basis as well as saving “snapshots” of weekly and monthly backups. 

Daily backup is advisable even if your small business website is not frequently updated with new content since it may still have plugins and themes which are updated regularly. For example, restoring a backup from an older version of WordPress can be problematic because updates are constantly being released. This means that your site may not have all the latest plugins and themes, which could lead to security issues. 

Test Your Backup and Restore Process Periodically

Note that backing up your website frequently is only one half of this equation. You must have an effective work process to restore your backups as well.

Make sure you regularly test this process to confirm that you are able to restore your website from a backup file. This is not a trivial task. You may want to consider a service that can allow you to streamline the process for backup and restore of your website.

We hope you have found this 12-step guide helpful in planning your small business website project. Of course, we believe most small business owners should spend their time working on their business and not their website.

At the end of the day, a reputable website developer who can leverage economies of expertise and scale to provide good support (including phone support – from a REAL PERSON) can save you money (and headaches) over the lifetime of your business. Of course, we are biased when we say this. However, this insight also comes with years of experience working with hundreds of business owners. The struggle is real. 

We build simple and professional small business websites. However, we cannot say that our websites are necessarily “better” than what others can build. In fact, we do not think that is true. Rather, our business is successful because of the support we offer to our customers.

We don’t just build a website and toss it over the fence. By far, the biggest part of our business is what we do once the client’s sites are completed. This removes the burden of website management from our customers and allows them to focus on building their businesses. 

Call Us to Learn about Simple Website Service

If you’re interesting learning about our turn-key small business website solution, please feel free to contact us (1-877-310-1426). Our customer support manager (yes, a REAL PERSON) will be happy to learn about your business and advise you if we can help.

Dr. Gary Leung

Dr. Gary Leung

Gary Leung is an Entrepreneur, Engineer, Mentor, Angel Investor and Public Speaker. He received a PhD from the Faculty of Engineering at the University of Toronto in 1994. He has had a successful career as Engineer, Manufacturing Systems Consultant, Business Executive, Entrepreneur and Investor. In 2002, he co-founded the Primacy group of companies, growing it to become the largest national network of primary care medical clinics in Canada with over 150 locations. He is currently the President of Trumpet Media Canada Inc. – a leading online marketing and website company focused on helping small business owners get online easily.

Get A Professional Website in Days!

Complete the form below or call us at 1-877-310-1426.
We will contact you to understand your needs.
Privacy Policy: We hate SPAM and promise to keep your email address safe